Coastal Collective Co.

Home Blog Posts

Coastal Interiors: A Thanksgiving Inspired Dining Room

Dining, Home Blog Posts, InteriorsAnneke McConnell

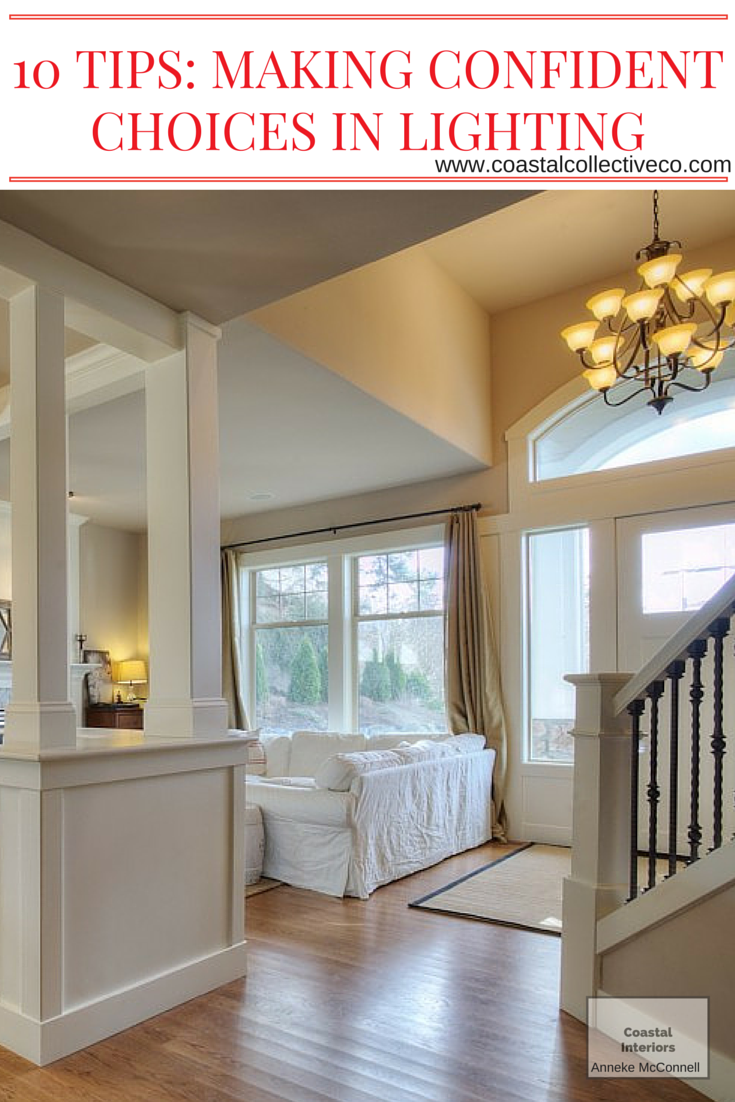
If you are looking to add gorgeous lighting to your home, Horchow is having 25% off for the next couple of days, not to mention some steep discounts on their mirrors. As for lighting, this is where I find so many lantern style pendants and chandeliers, antique brass finishes and overall is hands down a fave site of mine for lighting sources.  You can see their selection of lighting HERE.


These are just a handful of my favorites below, but their selection is stunning.  They have everything I love in design ranging from beaded chandelier, antique brass, capiz shells, jute rope and even lucite.  Gorgeous!


Today's design was inspired not only by these beautiful lighting options, but also this gorgeous brass silverware set.  I fell in love at first sight!  It has a slight hammered texture to it that I love.  What do you think?


It's a bit busy around these parts with furniture makeovers and the One Room Challenge, but be sure to browse the blog for recent blog posts including the Make It Happen Series and fashion for the season! OH!!! Which reminds me that Ann Taylor is also having 40% off Boots and Booties!!! Eek - hold me back! #pnwbootlover

Ok that's it for today! I hope you're week is going well!


xo,

Anneke


Follow along on instagram at:

@coastalcollectiveco

@coastalcollectivestyle

@coastalinteriors

Follow along on Facebook

Want to learn how to refinish your own furniture? Click HERE.

One Room Challenge Fall 2015: Week 1 Kitchen

Kitchen, Interiors, Home Blog PostsAnneke McConnell

There's nothing I love more than a good challenge, especially when it is challenging me to finish something I started this summer - our kitchen.  The One Room Challenge is a 6-week challenge, hosted by Linda of Calling It Home, to transform, finish, or fluff a room sharing weekly updates of their blog.  I've watched and admired the transformations in the past, but was not in a position to participate at that time.


If you're new to Coastal Collective Co., welcome!  This is a newer blog I launched in full force this Fall after taking a year off of blogging at my previous blog This, That and Life.  It's been a crazy and exciting transition from being full-time stay-at-home mama for the past 10 years (and part-time blogging the past few years), to full-time blogging now that all of our kiddos are in school during the day.


New beginnings can be scary, especially not transferring any previous content I had built up, but I'm having a blast being back to blogging and sharing with you all - my personal spin on everything from interior design, furniture makeovers, fashion, and what I've learned about blogging over the years and balancing it all!


Ok, so what about the challenge?!  Our little beach house kitchen is about to get DONE!  Finished! When my husband and I decided to move into our little beach house, he promised I could paint the cabinets white - my dream!! Two years later and this summer I impulsively cracked open my paint can and just started.  FYI....I don't recommend that, even after all that scheming in my head for months.  I had quite the good and back experience through it all, sharing the occasional post on Instagram, ultimately abandoning the full makeover in its entirety once the cabinets were painted and reinstalled.

I was burnt out. Done. No more.

I was also wanting to enjoy the view, enjoy my kid's summer break, and enjoy a functioning kitchen again.  Honestly, I vowed to never do a major project like that during the kid's summer break again. Yikes - but I will share what I learned with YOU, so you don't make the same mistakes I did. PLUS, I'm going to finish, because we still have a list of things to accomplish with the space. You are officially my accountability partner, ok?

Want to see the BEFORE photos already?  Here are photos of our kitchen when we had it listed as a vacation rental.  Yes...most of the time is spent looking out. We are extremely thankful and our move to this home has been a blessing!


So the kitchen, although very "orange-toned", was well taken care of when we bought it and it has great lines to work with.  We have much bigger plans in mind [renovation scale] to move the stove, flatten the island to countertop height, and upgrade appliances and flooring, but this plan is our mid-way "make it better on a budget with little mess" plan.


Here's the vision and plan:

  1. Make it affordable and manageable with the family schedule - so no new countertops, appliances, flooring, etc. at this time.
  2. Paint the cabinets white.
  3. Paint the walls - which color though, still not sure.
  4. Source, buy, and install knobs and pulls for the cabinets.
  5. Source, buy and install a new kitchen faucet. The current sink will stay.
  6. Choose finishing items: window treatments, kitchen rug, kitchen towels, wall decor.
  7. Tackle the backsplash.
  8. Address better storage solutions and organization of items in the cabinets and drawers.
  9. Address the little nook space next to the cabinets.
  10. Address the dining nook by the window.


I'd say that's a pretty good list to tackle over the next 6 weeks!  Check back every Thursday for updates and the final reveal with be November 12th - just before my birthday! Woohoo!  Here is the vision and a few inspirational photos to give you a better idea of my style and the looks I am drawn to.


source WS Home

Cheers to the next 6 weeks of progress updates and following along with the 20 selected designers and linking participants. Wish me luck!


****Update: here is the entire series

Week 1: The Vision and Before Photos

Week 2: Painting the Cabinets

Week 3: Purging, Storage and Organization Solutions in the Kitchen

Week 4: Herringbone Tile

Week 5: Evaluating Progress

Week 6: Kitchen Reveal


xo,

Anneke

Follow along on instagram at:

@coastalcollectiveco

@coastalcollectivestyle

@coastalinteriors

Follow along on Facebook


RECENT BLOG POSTS

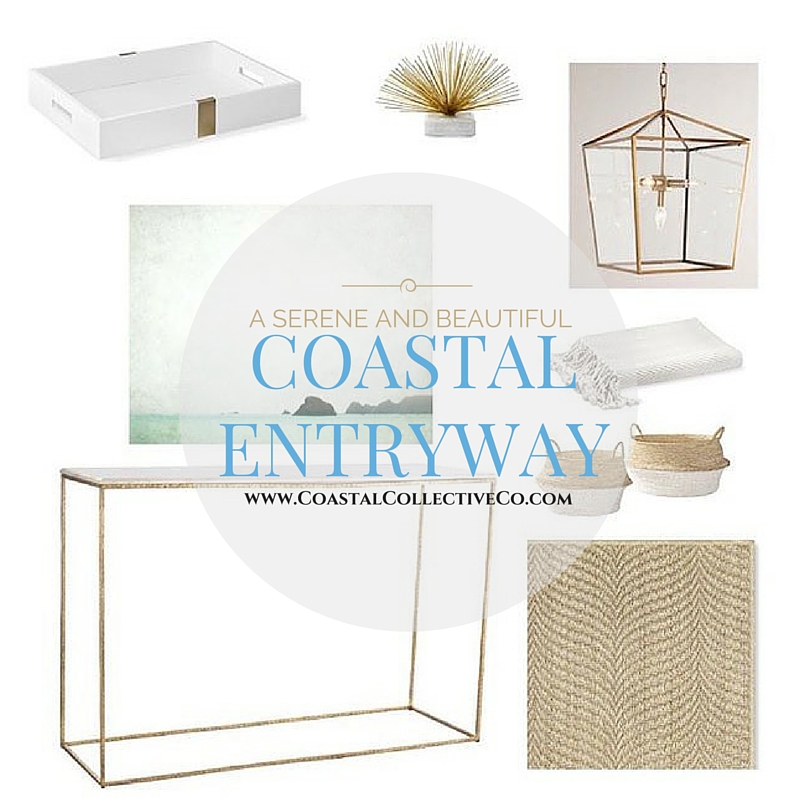
Coastal Interiors: Entryway Design and Decor Picks Under $100

Entryway, Home Blog PostsAnneke McConnell

Hello friends! Be sure to follow along on Instagram and Pinterest for all the behind the scenes, not to mention my new FAVE app Periscope!!


When it comes to design, I gravitate toward clean and simple, yet with an element of coziness and blended textures.  In today's entryway design (first shared on Instagram at @CoastalInteriors using LikeToKnow.It's services - sign up to easily shop my designs before they hit the blog).

Like I said above, I love clean lines and uncluttered design.  I do think that special items styled well make a beautiful difference and add character to your home.  I often love searching local antique shops on the surrounding PNW islands for a beautiful piece of coral.  It is one of the few things I collect and treasure, because each piece is unique and they look beautiful displayed throughout our home.  Below are some of my recent finds of mostly under $100 items I find either beautiful, functional, adding to a positive family life, or a great sale this week!  I'm honored to possibly be a part of helping you find a special new treasure or decor item to add to your home this season. These are anything from home decor items, lighting, and kitchen items for the upcoming Thanksgiving and Christmas season.  I love them all!


Below are a few items that caught my eye as I was searching for design ideas.  That blue velvet settee is gorgeous, isn't it?!

On a personal project note, I am continuing to work on our open kitchen, dining, and living room space at our beach house [series on previous blog] as well as a mini makeover on our kid's shared bedroom. These things never seem to happen as quickly as I'd like, but I'd rather take it in stride than rush it!


***Congratulations to Shirley Higgins who won the Instagram Giveaway. Please email me at coastalcollectiveco@gmail.com by October 26th, 2015 with subject line GIVEAWAY to claim your prize! Thank you to everyone who entered. We will have more of these giveaways in the coming weeks!


Thank you for visiting and enjoy your day!

xo,

Anneke

Follow along on instagram at:

@coastalcollectiveco

@coastalcollectivestyle

@coastalinteriors

Follow along on Facebook

Want to learn how to refinish your own furniture? Click HERE.


Recent Blog Posts


DIY Whitewashed Table: Before and After

Dining, Home Blog Posts, InteriorsAnneke McConnell

Hello friends! Be sure to follow along on Instagram and Pinterest for all the behind the scenes!


So long story short, when we moved into our little beach house a couple years ago, we slowly have been making it "us" versus a vacation rental, but as a family of five in such a small (poorly designed layout) space, the decorating and function has been quite the challenge.  I really miss my oversized solid wood farmhouse table!  I've really missed not having really any definitive dining space at all. Cue the sad music...


With that said, I am also a firm believe that you are not a "victim" to your circumstances and to make the best with what you have and go for it.  Our layout isn't ideal for everything we'd like to enjoy and has to be multi-functional.  I decided to trade the lower lounge chairs and view for a dining table we could all sit down together at and enjoy our meals, game nights, etc. No more splitting between the bistro table nook and bar seating, especially now that summer is over and we are not sitting on the back patio for meals.

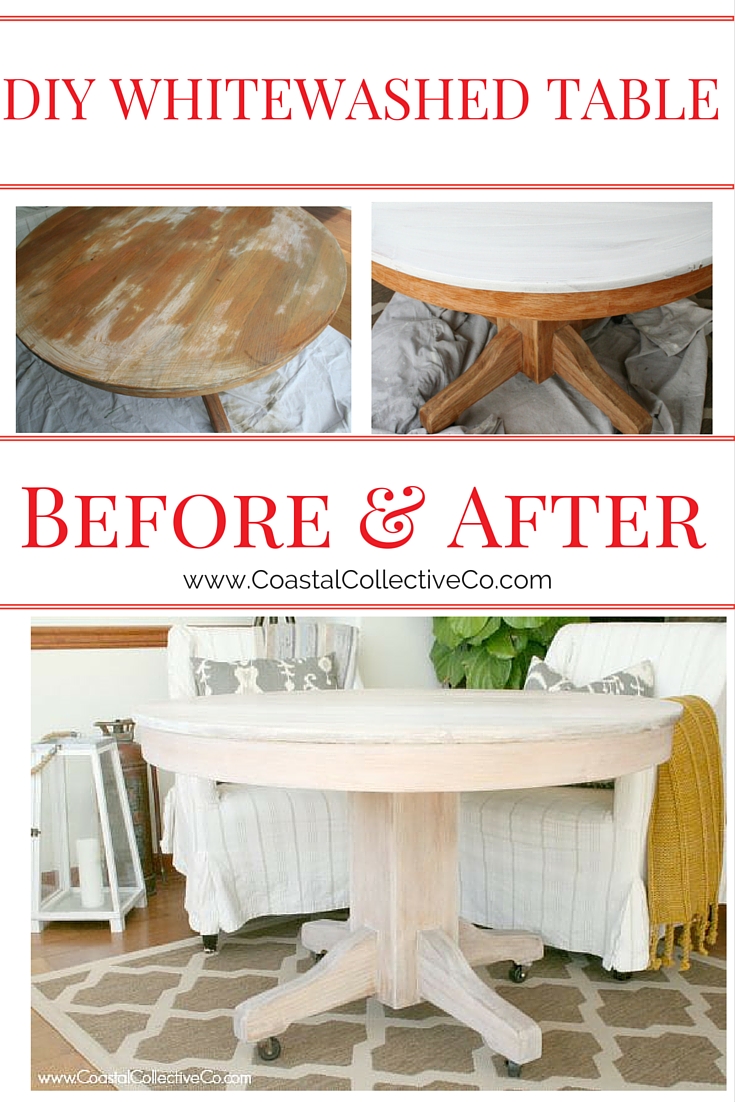
I was excited to find this table on Craigslist locally for $80 and have it delivered to me.  With a couple day's of focused work, I was able to turn it into a table with that Restoration Hardware like look that we all know and love.

Here is the Before and After!


The process isn't too crazy difficult, and I just worked right in our home where the table was going to be. Here's the step-by-step run down.  Most products can be found at your local hardware store.

  1. I placed a dropcoth under my table to protect my rug and floor.
  2. I applied Citristrip (a product stripper) on the table top and base (with basic, cheap chip brushes).
  3. I used a scraper to remove the stripper and gunk from the table top. This gives you clean, raw wood to work with.
  4. I had to do two rounds of stripper to get the table prepped, and then afterwards cleaned it with Odorless Mineral Spirits. This is what I had on hand, but you can also use Citristrip's Paint Stripper Afterwash.
  5. Now for the FUN part!  For this makeover, I used Vintage Market Furniture Paint in Dove White and mixed up a simple "wash" with roughly equal parts paint and water.  There is NO set formula for this!  The more water you add, the more diluted and lighter or washed out/opaque the color will be. Two alternative white colors I recommend are Rustoleum's Chalked Paint in Linen White OR Annie Sloan Chalk Paint in Pure White. **Update: Since this post, I painted the apron and base of this table in Annie Sloan Pure White. :-)
  6. Apply the wash in sections of the table. Wipe away immediately or let it sit for a minute or two and then wipe away.  I used staining pads for this and they work beautifully! Much better than the old days when I used old t-shirts or rags. Lol 
  7. When you are wiping the color away, I suggest finishing out by wiping in one direction.  On a table like this, I finished removing excess paint in the direction of the grain.  This is NOT necessary every time to use a paint wash to makeover a piece of furniture!
  8. Move to the table apron,  then the base in sections.
  9. Let paint wash fully cure.
  10. Seal using staining pad and Vintage Market and Design Matte Finishing Creme (which is amazingly beautiful and durable!) I suggest applying 1-3 coats in a similar manner as the painting process.  Apply, let sit, then wipe and buff out.
  11. Let the table dry/cure for a few days before full use.

Overall, I LOVE the way it turned out and am excited to keep working on the dining space.  I have a cabinet for the wall I am working on, and am planning to get a nice lantern light up above the table.  I really like this style with black metal and glass panes. We'll see.....I may not be able to hard wire the lighting and am brainstorming a work around. ;-) There's always a work around!


I hope you found this makeover helpful! If you'd like to stay in the loop about how to refinish your own furniture and create your own masterpiece, Click HERE.


Have a beautiful day friends!

xo,

Anneke

Follow along on instagram at:

@annekemcconnell

@coastalinteriors

Follow along on Facebook